Contents
Articles
2026
- What the last decade of Android Enterprise DPC migration could have been
- Introducing DeltaWatch: web change detection
- Android Enterprise lands on Android XR
- How MIKA works: building an AI assistant for bayton.org
- Bayton.org goes AI-first: meet MIKA
- TCL Note A1 NXTPAPER hands-on
- What's new in the 2026 Android Security Paper?
- MDM is dead. Long live ACE?
- Introducing AMAPI Commander: converse with your Android estate
- MANAGED INFO is going licence-free
2025
- Google Play Protect is now the custom DPC gatekeeper, and everyone is a threat by default
- 12 deliveries of AE-mas (What shipped in Android Enterprise in 2025)
- The 12 AE requests of Christmas (2025 Edition)
- RCS Archival and you: clearing up the misconceptions
- Device Trust from Android Enterprise: What it is and how it works (hands-on)
- Android developer verification: what this means for consumers and enterprise
- AMAPI finally supports direct APK installation, this is how it works
- The Android Management API doesn't support pulling managed properties (config) from app tracks. Here's how to work around it
- Hands-on with CVE-2025-22442, a work profile sideloading vulnerability affecting most Android devices today
- AAB support for private apps in the managed Google Play iFrame is coming, take a first look here
- What's new (so far) for enterprise in Android 16
2024
- Android 15: What's new for enterprise?
- How Goto's acquisition of Miradore is eroding a once-promising MDM solution
- Google Play Protect no longer sends sideloaded applications for scanning on enterprise-managed devices
- Mobile Pros is moving to Discord
- Avoid another CrowdStrike takedown: Two approaches to replacing Windows
- Introducing MANAGED SETTINGS
- I'm joining NinjaOne
- Samsung announces Knox SDK restrictions for Android 15
- What's new (so far) for enterprise in Android 15
- Google quietly introduces new quotas for unvalidated AMAPI use
- What is Play Auto Install (PAI) in Android and how does it work?
- AMAPI publicly adds support for DPC migration
- How do Android devices become certified?
2023
- Mute @channel & @here notifications in Slack
- A guide to raising better support requests
- Ask Jason: How should we manage security and/or OS updates for our devices?
- Pixel 8 series launches with 7 years of software support
- Android's work profile behaviour has been reverted in 14 beta 5.3
- Fairphone raises the bar with commitment to Android updates
- Product files: The DoorDash T8
- Android's work profile gets a major upgrade in 14
- Google's inactive account policy may not impact Android Enterprise customers
- Product files: Alternative form factors and power solutions
- What's new in Android 14 for enterprise
- Introducing Micro Mobility
- Android Enterprise: A refresher
2022
- What I'd like to see from Android Enterprise in 2023
- Thoughts on Android 12's password complexity changes
- Google Play target API requirements & impact on enterprise applications
- Sunsetting Discuss comment platform
- Google publishes differences between Android and Android Go
- Android Go & EMM support
- Relaunching bayton.org
- AER dropped the 3/5 year update mandate with Android 11, where are we now?
- I made a bet with Google (and lost)
2020
- Product files: Building Android devices
- Google announce big changes to zero-touch
- VMware announces end of support for Device Admin
- Google launch the Android Enterprise Help Community
- Watch: An Android Enterprise discussion with Hypergate
- Listen again: BM podcast #144 - Jason Bayton & Russ Mohr talk Android!
- Google's Android Management API will soon support COPE
- Android Enterprise in 11: Google reduces visibility and control with COPE to bolster privacy.
- The decade that redefined Android in the enterprise
2019
- Why Intune doesn't support Android Enterprise COPE
- VMware WS1 UEM 1908 supports Android Enterprise enrolments on closed networks and AOSP devices
- The Bayton 2019 Android Enterprise experience survey
- Android Enterprise Partner Summit 2019 highlights
- The Huawei ban and Enterprise: what now?
- Dabbling with Android Enterprise in Q beta 3
- Why I moved from Google WiFi to Netgear Orbi
- I'm joining Social Mobile as Director of Android Innovation
- Android Enterprise in Q/10: features and clarity on DA deprecation
- MWC 2019: Mid-range devices excel, 5G everything, form-factors galore and Android Enterprise
- UEM tools managing Android-powered cars
- Joining the Android Enterprise Experts community
- February was an interesting month for OEMConfig
- Google launch Android Enterprise Recommended for Managed Service Providers
- Migrating from Windows 10 Mobile? Here's why you should consider Android
- AER expands: Android Enterprise Recommended for EMMs
- What I'd like to see from Android Enterprise in 2019
2018
- My top Android apps in 2018
- Year in review: 2018
- MobileIron Cloud R58 supports Android Enterprise fully managed devices with work profiles
- Hands on with the Huawei Mate 20 Pro
- Workspace ONE UEM 1810 introduces support for Android Enterprise fully managed devices with work profiles
- G Suite no longer prevents Android data leakage by default
- Live: Huawei Mate series launch
- How to sideload the Digital Wellbeing beta on Pie
- How to manually update the Nokia 7 Plus to Android Pie
- Hands on with the BQ Aquaris X2 Pro
- Hands on with Sony OEMConfig
- The state of Android Enterprise in 2018
- BYOD & Privacy: Don’t settle for legacy Android management in 2018
- Connecting two Synologies via SSH using public and private key authentication
- How to update Rsync on Mac OS Mojave and High Sierra
- Intune gains support for Android Enterprise COSU deployments
- Android Enterprise Recommended: HMD Global launch the Nokia 3.1 and Nokia 5.1
- Android Enterprise Partner Summit 2018 highlights
- Live: MobileIron LIVE! 2018
- Android Enterprise first: AirWatch 9.4 lands with a new name and focus
- Live: Android Enterprise Partner Summit 2018
- Samsung, Oreo and an inconsistent Android Enterprise UX
- MobileIron launch Android Enterprise work profiles on fully managed devices
- Android P demonstrates Google's focus on the enterprise
- An introduction to managed Google Play
- MWC 2018: Android One, Oreo Go, Android Enterprise Recommended & Android Enterprise
- Enterprise ready: Google launch Android Enterprise Recommended
2017
- Year in review: 2017
- Google is deprecating device admin in favour of Android Enterprise
- Hands on with the Sony Xperia XZ1 Compact
- Moto C Plus giveaway
- The state of Android Enterprise in 2017
- Samsung launched a Note 8 for enterprise
- MobileIron officially supports Android Enterprise QR code provisioning
- Android zero-touch enrolment has landed
- MobileIron unofficially supports QR provisioning for Android Enterprise work-managed devices, this is how I found it
- Hands on with the Nokia 3
- Experimenting with clustering and data replication in Nextcloud with MariaDB Galera and SyncThing
- Introducing documentation on bayton.org
- Goodbye Alexa, Hey Google: Hands on with the Google Home
- Restricting access to Exchange ActiveSync
- What is Mobile Device Management?
- 8 tips for a successful EMM deployment
- Long-term update: the fitlet-RM, a fanless industrial mini PC by Compulab
- First look: the FreedomPop V7
- Vault7 and the CIA: This is why we need EMM
- What is Android Enterprise (Android for Work) and why is it used?
- Introducing night mode on bayton.org
- What is iOS Supervision and why is it used?
- Hands on with the Galaxy TabPro S
- Introducing Nextcloud demo servers
- Part 4 - Project Obsidian: Obsidian is dead, long live Obsidian
2016
- My top Android apps 2016
- Hands on with the Linx 12V64
- Wandera review 2016: 2 years on
- Deploying MobileIron 9.1+ on KVM
- Hands on with the Nextcloud Box
- How a promoted tweet landed me on Finnish national news
- Using RWG Mobile for simple, cross-device centralised voicemail
- Part 3 – Project Obsidian: A change, data migration day 1 and build day 2
- Hands on: fitlet-RM, a fanless industrial mini PC by Compulab
- Part 2 - Project Obsidian: Build day 1
- Part 1 - Project Obsidian: Objectives & parts list
- Part 0 - Project Obsidian: Low power NAS & container server
- 5 Android apps improving my Chromebook experience
- First look: Android apps on ChromeOS
- Competition: Win 3 months of free VPS/Container hosting - Closed!
- ElasticHosts review
- ElasticHosts: Cloud Storage vs Folders, what's the difference?
- Adding bash completion to LXD
- Android N: First look & hands-on
- Springs.io - Container hosting at container prices
- Apple vs the FBI: This is why we need MDM
- Miradore Online MDM: Expanding management with subscriptions
- Lenovo Yoga 300 (11IBY) hard drive upgrade
- I bought a Lenovo Yoga 300, this is why I'm sending it back
- Restricting access to Exchange ActiveSync
- Switching to HTTPS on WordPress
2015
2014
- Is CYOD the answer to the BYOD headache?
- BYOD Management: Yes, we can wipe your phone
- A fortnight with Android Wear: LG G Watch review
- First look: Miradore Online free MDM
- Hands on: A weekend with Google Glass
- A month with Wandera Mobile Gateway
- Final thoughts: Dell Venue Pro 11 (Atom)
- Thoughts on BYOD
- Will 2014 bring better battery life?
- My year in review: Bayton.org
- The best purchase I've ever made? A Moto G for my father
2013
2012
- My Top Android Apps 12/12
- The Nexus 7 saga: Resolved
- Recycling Caps Lock into something useful - Ubuntu (12.04)
- The Nexus 7 saga continues
- From Wows to Woes: Why I won't be recommending a Nexus7 any time soon.
- Nexus7: What you need to know
- Why I disabled dlvr.it links on Facebook
- HTC Sense: Changing the lockscreen icons from within ADW
2011
- Push your Google+ posts to Twitter and Facebook
- Using multiple accounts with Google.
- The "Wn-R48" (Windows on the Cr-48)
- Want a Google+ invite?
- Publishing to external sources from Google+
- Dell Streak review. The Phone/Tablet Hybrid
- BlueInput: The Bluetooth HID driver Google forgot to include
- Pushing Buzz to Twitter with dlvr.it
- Managing your social outreach with dlvr.it
- When Awe met Some. The Cr-48 and Gnome3.
- Living with Google's Cr-48 and the cloud.
- Downtime 23-25/04/2011
- Are you practising "safe surfing"?
- The Virtualbox bug: "Cannot access the kernel driver" in Windows
- Putting tech into perspective
2010
- Have a Google Buzz Christmas
- Root a G1 running Android 1.6 without recovery!
- Windows 7 display issues on old Dell desktops
- Google added the Apps flexibility we've been waiting for!
- Part I: My 3 step program for moving to Google Apps
- Downloading torrents
- Completing the Buzz experience for Google Maps Mobile
- Quicktip: Trial Google Apps
- Quicktip: Save internet images fast
- Turn your desktop 3D!
- Part III - Device not compatible - Skype on 3
- Swype not compatible? ShapeWriter!
- Don't wait, get Swype now!
- HideIP VPN. Finally!
- Google enables Wave for Apps domains
- Aspire One touch screen
- Streamline XP into Ubuntu
- Edit a PDF with Zamzar
- Google offering Gmail addresses in the UK
- Google Wave: Revolutionising blogs!
- Hexxeh's Google Chrome OS builds
- Update: Buzz on Windows Mobile
- Alternatives to Internet Explorer
- Wordress 3.0 is coming!
- Skype for WM alternatives
- Browsing on a (data) budget? Opera!
- Buzz on unsupported mobiles
- Buzz on your desktop
- What's all the Buzz?
- Part II: Device not compatible - Skype on 3
- Part I - Device not compatible - Skype on 3
- Dreamscene on Windows 7
- Free Skype with 3? There's a catch..
Streamline XP into Ubuntu
Contents
Recently Ubuntu 10.04 LTS was released and after spending a few hours on the LiveCD I finally found a reason to migrate my Windows run laptops to this faster, lighter Operating System. I was getting sick of Windows and the constant management I had to do to keep it running at optimal spec, I do enough of that in work! When I get home I want a system I can turn on and in 10 seconds be browsing the net (that’s basically all I use my laptop for), Ubuntu does that for me.
However (there’s always something, right?), given that Windows owns roughly 91% of the Market Share of Operating Systems (source) it’s inevitable that I’ll want to do something with a program that’s only available in Windows at some point. It’s a sad truth that no matter how hard you try, completely breaking away from Windows is an extremely difficult task (I’ll always have to use it in Work for example, and I’m not complaining since Windows is my work!). So I’m doing the next best thing.
By streamlining Windows into my Ubuntu OS, I can use the sleek, fast OS on a daily basis and should I need to do something in Windows (Photoshop? Office 2007?) I can boot up my Windows OS and run my Windows programs natively in the Ubuntu System.
Don’t get me wrong, there’s always WINE, but I’ve had more problems getting that to work seamlessly than I have getting XP to boot in Ubuntu! Here’s what I did from start to finish, a complete guide to getting Windows (in this case XP) running seamlessly inside Ubuntu.
1) Creating the environment for XP to run
#I want XP to run in a virtual environment, separate from Ubuntu so as not to cause any clashes between the operating systems. I want to be able to right-click and delete XP on a whim if I decide I don’t want it any more!
As we’re setting up a virtual environment, we will need a few things:
- Your ISO/CD to install an operating system (and license key!)
- VirtualBox
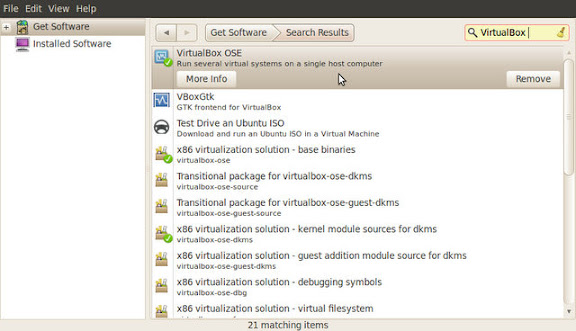
There’s a great, free open source virtual manager named VirtualBox OSE which I’ll be using to set up the environment, but you should note immediately that the OSE version does not support USB. If you can’t live without USB you should download the personal edition of VirtualBox.
Using Ubuntu’s Software Centre, search for VirtualBox OSE and install it.
Once it’s installed, you’ll see it in Applications > Accessories > VirtualBox OSE. Open the program and you’ll be greeted with the VirtualBox GUI and a setup screen for a new virtual machine (if not, please click New!)
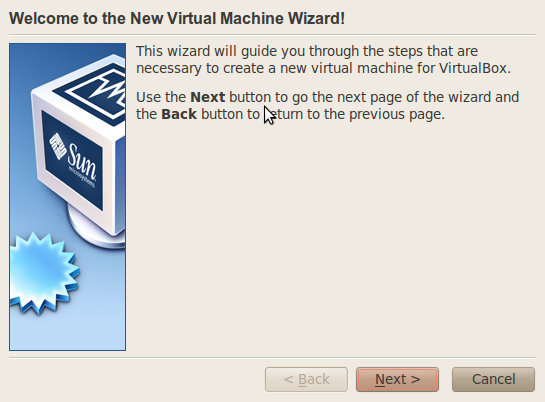
The following screens show how I set up my new XP virtual machine:
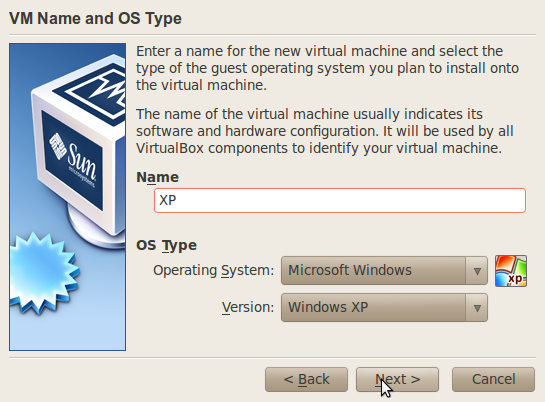
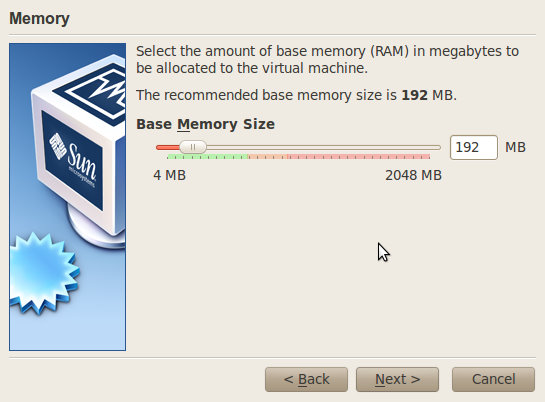
I decided that at the moment, I have no intention of using memory heavy applications in XP, though I may change this at a later date. If you feel you will be wanting to run heavy applications you may consider increasing the ram used to a higher amount, however note that you should not set it too high, as you want your host OS to run stably aswell!
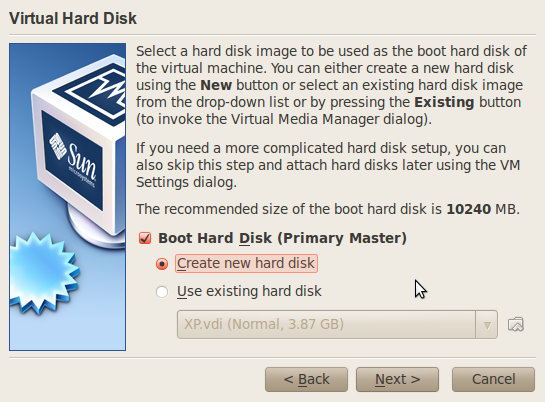
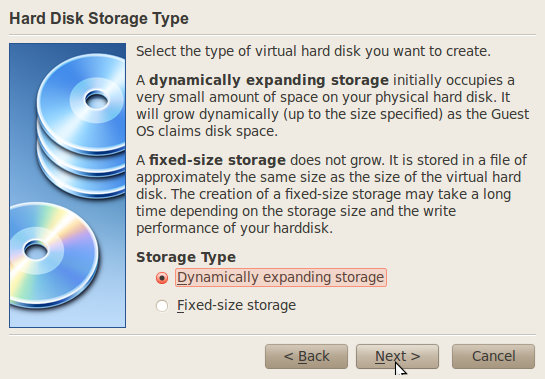
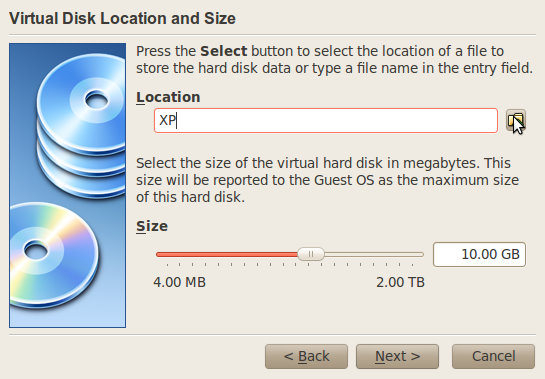
Here as I have not created a virtual OS before, I had to set up a new virtual disk. This is what I mentioned earlier about setting up a separate system so that the OS’s don’t clash with each other, here are the settings I selected for the HardDisk:
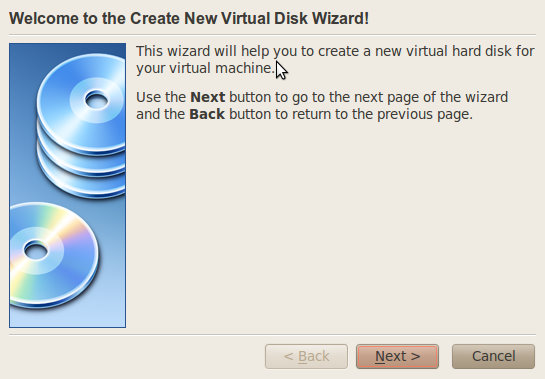
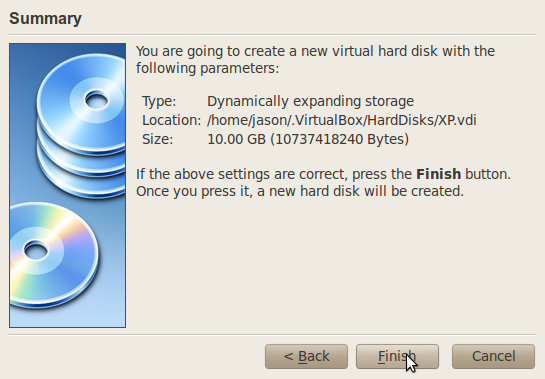
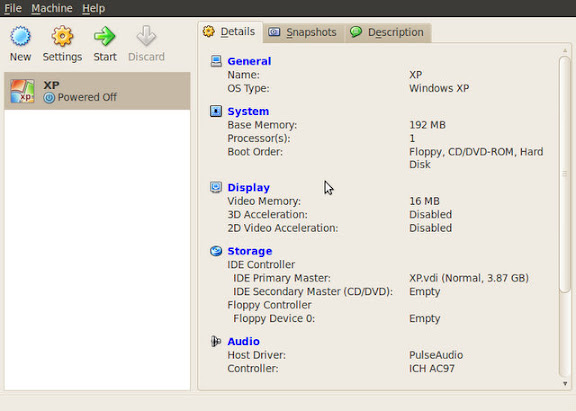
From here the Wizard finishes and gives you a nice new OS listed in your Virtual machines:
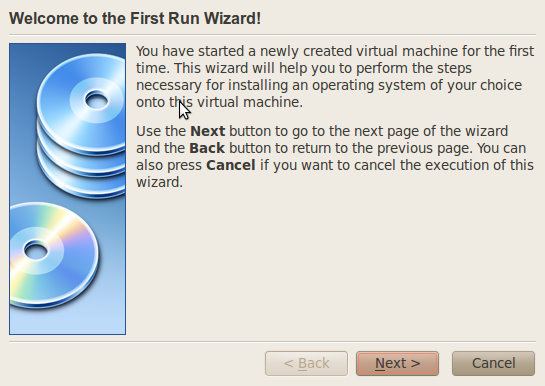
Select it, and click “start”. You will be prompted by a window, and then a new wizard will appear:

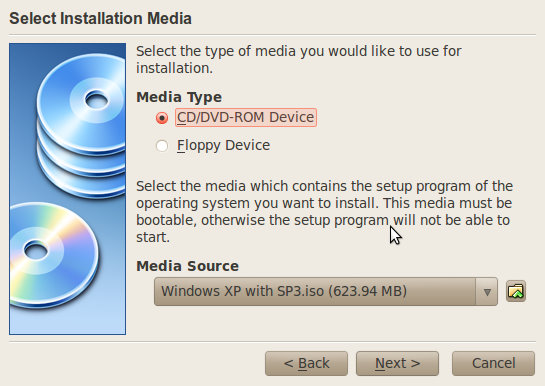
If you’re using a CD, leave the above settings as they are and click next. However if you are using an ISO from your computer you will need to click the little folder icon to the right of the Media Source drop down, on the next screen select “add” and navigate to your ISO image. It will then display as below:
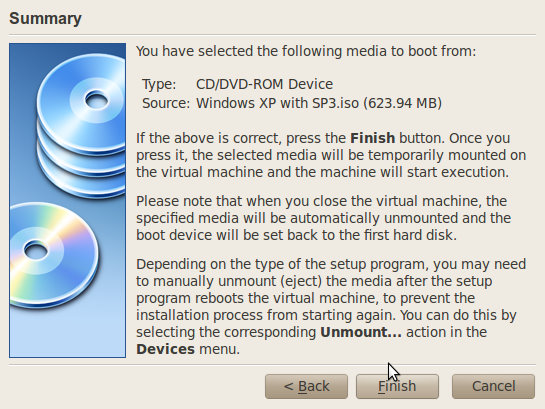
That’s the end of the Wizard, and now you’ll see the Virtual window kick-start into life, with the familiar XP install screens:
![Screenshot-XP1 [Running] - VirtualBox OSE.jpg](https://lh4.ggpht.com/_XtX1xEyLe2k/S_EP4d59pTI/AAAAAAAAFBw/afUOmxGmsmg/Screenshot-XP1%20%5BRunning%5D%20-%20VirtualBox%20OSE.jpg?imgmax=576)
![Screenshot-XP1 [Running] - VirtualBox OSE-1.jpg](https://lh6.ggpht.com/_XtX1xEyLe2k/S_EQAOiUqWI/AAAAAAAAFB0/bFHMbbkPCdM/Screenshot-XP1%20%5BRunning%5D%20-%20VirtualBox%20OSE-1.jpg?imgmax=576)
![Screenshot-XP1 (Snapshot 1) [Running] - VirtualBox OSE.jpg](https://lh5.ggpht.com/_XtX1xEyLe2k/S_EQQhrFR8I/AAAAAAAAFB4/9imRSDp6U8w/Screenshot-XP1%20%28Snapshot%201%29%20%5BRunning%5D%20-%20VirtualBox%20OSE.jpg?imgmax=576)
The unpartitioned space will be different depending on the size of the virtual disk you made!
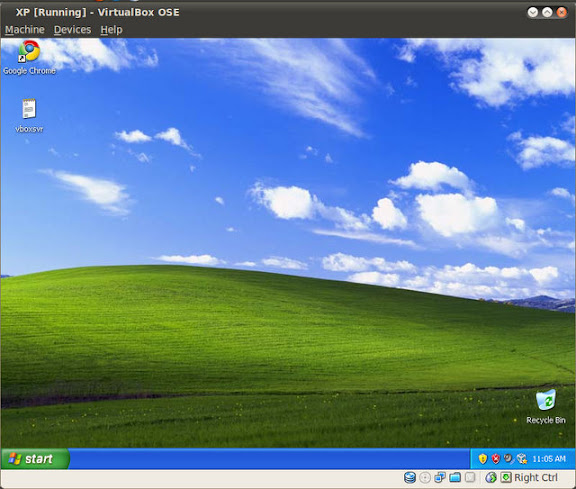
Following these steps, XP will install itself (you’ll get the usual XP setup screens) and within 10 or so minutes you’ll be presented with the familiar grassy hills and blue start menu that you’re used to! Is it good to be back? 😉
2) Let’s make it Seamless…
#At the moment, this is how the virtual machine looks against your normal system:
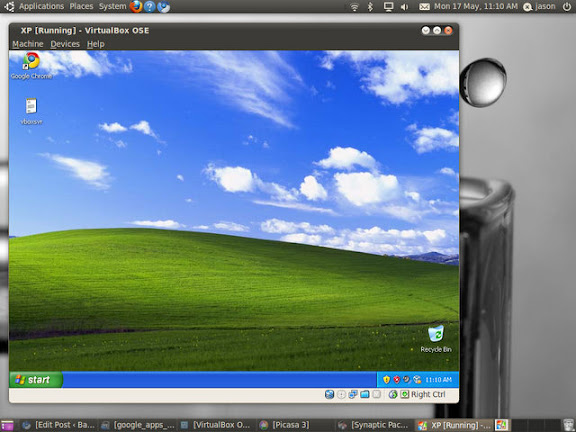
So there’s still a little work to do! Back to the Virtual Window:
![Screenshot-XP [Running] - VirtualBox OSE-1.jpg](https://lh3.ggpht.com/_XtX1xEyLe2k/S_EWSuEvCVI/AAAAAAAAFCU/9yCkx2bXX8Y/Screenshot-XP%20%5BRunning%5D%20-%20VirtualBox%20OSE-1.jpg?imgmax=576)
To get seamless integration to work, we’ll need to first install an extra package from VirtualBox. Navigate to Devices > Install Guest Additions… (Host + D)
![Screenshot-XP [Running] - VirtualBox OSE-2.jpg](https://lh5.ggpht.com/_XtX1xEyLe2k/S_EWc17Y22I/AAAAAAAAFCY/oUZVBit0qNk/Screenshot-XP%20%5BRunning%5D%20-%20VirtualBox%20OSE-2.jpg?imgmax=576)
![Screenshot-XP [Running] - VirtualBox OSE-3.jpg](https://lh5.ggpht.com/_XtX1xEyLe2k/S_EWhkB5UBI/AAAAAAAAFCc/TOUsVkilfcg/Screenshot-XP%20%5BRunning%5D%20-%20VirtualBox%20OSE-3.jpg?imgmax=576)
![Screenshot-XP [Running] - VirtualBox OSE-4.jpg](https://lh6.ggpht.com/_XtX1xEyLe2k/S_EWqPXwEoI/AAAAAAAAFCg/7EsSrTch3EI/Screenshot-XP%20%5BRunning%5D%20-%20VirtualBox%20OSE-4.jpg?imgmax=576)
![Screenshot-XP [Running] - VirtualBox OSE-5.jpg](https://lh3.ggpht.com/_XtX1xEyLe2k/S_EWv8zuYKI/AAAAAAAAFCk/RB2H5gDGy9c/Screenshot-XP%20%5BRunning%5D%20-%20VirtualBox%20OSE-5.jpg?imgmax=576)
Optionally, you can install Direct3D Support, though not required (I did, and it didn’t make much difference).
![Screenshot-XP [Running] - VirtualBox OSE-6.jpg](https://lh5.ggpht.com/_XtX1xEyLe2k/S_EWzkrBKqI/AAAAAAAAFCs/674o1avrYD0/Screenshot-XP%20%5BRunning%5D%20-%20VirtualBox%20OSE-6.jpg?imgmax=576)
![Screenshot-XP [Running] - VirtualBox OSE-7.jpg](https://lh3.ggpht.com/_XtX1xEyLe2k/S_EW6g2TVjI/AAAAAAAAFC0/2-xFyzmnUK4/Screenshot-XP%20%5BRunning%5D%20-%20VirtualBox%20OSE-7.jpg?imgmax=576)
These messages may pop up, it’s the typical “non-trusted” driver installation. Continue as per normal as they’re perfectly safe.
![Screenshot-XP [Running] - VirtualBox OSE-8.jpg](https://lh4.ggpht.com/_XtX1xEyLe2k/S_EXDJEqfPI/AAAAAAAAFC4/LjQIJcVJmQE/Screenshot-XP%20%5BRunning%5D%20-%20VirtualBox%20OSE-8.jpg?imgmax=576)
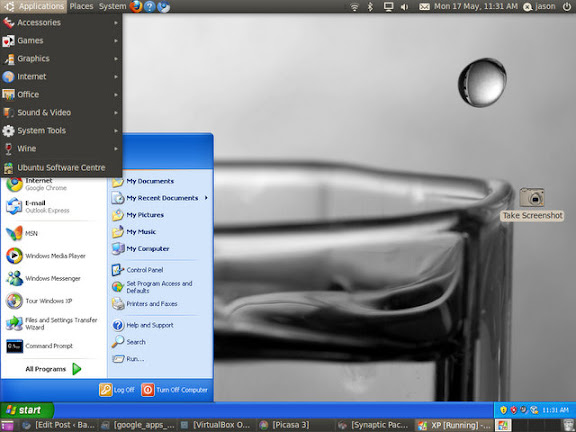
Once you’ve restarted the virtual machine, navigate to Machine > Seamless Mode and voila!
![Screenshot-XP [Running] - VirtualBox OSE-9.jpg](https://lh6.ggpht.com/_XtX1xEyLe2k/S_EaVDAYXLI/AAAAAAAAFC8/ojcn-wBrGsA/Screenshot-XP%20%5BRunning%5D%20-%20VirtualBox%20OSE-9.jpg?imgmax=576)
3) We’re almost there…
#Well, actually we are there, however something that bugged me was needing to open Virtualbox OSE when I wanted to start the XP Virtual machine. Well I’m too impatient for that, so here’s a quick and easy way of making a direct shortcut to the virtual machine itself:
Right click on the desktop and select Create Launcher…
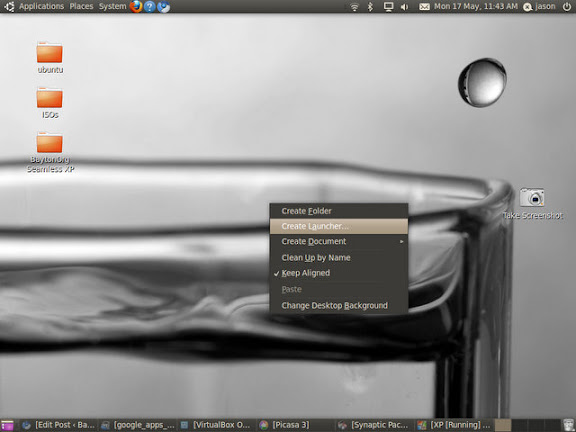
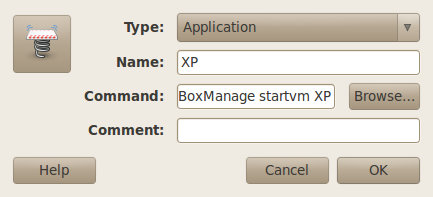
In the command box, type VBoxManage startvm [your virtual machine name] and click ok.

**Now, whenever you need to use that Windows program you can boot up XP from the desktop shortcut, (it should default to seamless mode) and enjoy!!
Should you need to get it out of seamless mode, hit Right CTRL + L.I’m just happy I can now use the location feature in Windows’ version of Google Chrome 🙂
Cheers,
Articles
2026
- What the last decade of Android Enterprise DPC migration could have been
- Introducing DeltaWatch: web change detection
- Android Enterprise lands on Android XR
- How MIKA works: building an AI assistant for bayton.org
- Bayton.org goes AI-first: meet MIKA
- TCL Note A1 NXTPAPER hands-on
- What's new in the 2026 Android Security Paper?
- MDM is dead. Long live ACE?
- Introducing AMAPI Commander: converse with your Android estate
- MANAGED INFO is going licence-free
2025
- Google Play Protect is now the custom DPC gatekeeper, and everyone is a threat by default
- 12 deliveries of AE-mas (What shipped in Android Enterprise in 2025)
- The 12 AE requests of Christmas (2025 Edition)
- RCS Archival and you: clearing up the misconceptions
- Device Trust from Android Enterprise: What it is and how it works (hands-on)
- Android developer verification: what this means for consumers and enterprise
- AMAPI finally supports direct APK installation, this is how it works
- The Android Management API doesn't support pulling managed properties (config) from app tracks. Here's how to work around it
- Hands-on with CVE-2025-22442, a work profile sideloading vulnerability affecting most Android devices today
- AAB support for private apps in the managed Google Play iFrame is coming, take a first look here
- What's new (so far) for enterprise in Android 16
2024
- Android 15: What's new for enterprise?
- How Goto's acquisition of Miradore is eroding a once-promising MDM solution
- Google Play Protect no longer sends sideloaded applications for scanning on enterprise-managed devices
- Mobile Pros is moving to Discord
- Avoid another CrowdStrike takedown: Two approaches to replacing Windows
- Introducing MANAGED SETTINGS
- I'm joining NinjaOne
- Samsung announces Knox SDK restrictions for Android 15
- What's new (so far) for enterprise in Android 15
- Google quietly introduces new quotas for unvalidated AMAPI use
- What is Play Auto Install (PAI) in Android and how does it work?
- AMAPI publicly adds support for DPC migration
- How do Android devices become certified?
2023
- Mute @channel & @here notifications in Slack
- A guide to raising better support requests
- Ask Jason: How should we manage security and/or OS updates for our devices?
- Pixel 8 series launches with 7 years of software support
- Android's work profile behaviour has been reverted in 14 beta 5.3
- Fairphone raises the bar with commitment to Android updates
- Product files: The DoorDash T8
- Android's work profile gets a major upgrade in 14
- Google's inactive account policy may not impact Android Enterprise customers
- Product files: Alternative form factors and power solutions
- What's new in Android 14 for enterprise
- Introducing Micro Mobility
- Android Enterprise: A refresher
2022
- What I'd like to see from Android Enterprise in 2023
- Thoughts on Android 12's password complexity changes
- Google Play target API requirements & impact on enterprise applications
- Sunsetting Discuss comment platform
- Google publishes differences between Android and Android Go
- Android Go & EMM support
- Relaunching bayton.org
- AER dropped the 3/5 year update mandate with Android 11, where are we now?
- I made a bet with Google (and lost)
2020
- Product files: Building Android devices
- Google announce big changes to zero-touch
- VMware announces end of support for Device Admin
- Google launch the Android Enterprise Help Community
- Watch: An Android Enterprise discussion with Hypergate
- Listen again: BM podcast #144 - Jason Bayton & Russ Mohr talk Android!
- Google's Android Management API will soon support COPE
- Android Enterprise in 11: Google reduces visibility and control with COPE to bolster privacy.
- The decade that redefined Android in the enterprise
2019
- Why Intune doesn't support Android Enterprise COPE
- VMware WS1 UEM 1908 supports Android Enterprise enrolments on closed networks and AOSP devices
- The Bayton 2019 Android Enterprise experience survey
- Android Enterprise Partner Summit 2019 highlights
- The Huawei ban and Enterprise: what now?
- Dabbling with Android Enterprise in Q beta 3
- Why I moved from Google WiFi to Netgear Orbi
- I'm joining Social Mobile as Director of Android Innovation
- Android Enterprise in Q/10: features and clarity on DA deprecation
- MWC 2019: Mid-range devices excel, 5G everything, form-factors galore and Android Enterprise
- UEM tools managing Android-powered cars
- Joining the Android Enterprise Experts community
- February was an interesting month for OEMConfig
- Google launch Android Enterprise Recommended for Managed Service Providers
- Migrating from Windows 10 Mobile? Here's why you should consider Android
- AER expands: Android Enterprise Recommended for EMMs
- What I'd like to see from Android Enterprise in 2019
2018
- My top Android apps in 2018
- Year in review: 2018
- MobileIron Cloud R58 supports Android Enterprise fully managed devices with work profiles
- Hands on with the Huawei Mate 20 Pro
- Workspace ONE UEM 1810 introduces support for Android Enterprise fully managed devices with work profiles
- G Suite no longer prevents Android data leakage by default
- Live: Huawei Mate series launch
- How to sideload the Digital Wellbeing beta on Pie
- How to manually update the Nokia 7 Plus to Android Pie
- Hands on with the BQ Aquaris X2 Pro
- Hands on with Sony OEMConfig
- The state of Android Enterprise in 2018
- BYOD & Privacy: Don’t settle for legacy Android management in 2018
- Connecting two Synologies via SSH using public and private key authentication
- How to update Rsync on Mac OS Mojave and High Sierra
- Intune gains support for Android Enterprise COSU deployments
- Android Enterprise Recommended: HMD Global launch the Nokia 3.1 and Nokia 5.1
- Android Enterprise Partner Summit 2018 highlights
- Live: MobileIron LIVE! 2018
- Android Enterprise first: AirWatch 9.4 lands with a new name and focus
- Live: Android Enterprise Partner Summit 2018
- Samsung, Oreo and an inconsistent Android Enterprise UX
- MobileIron launch Android Enterprise work profiles on fully managed devices
- Android P demonstrates Google's focus on the enterprise
- An introduction to managed Google Play
- MWC 2018: Android One, Oreo Go, Android Enterprise Recommended & Android Enterprise
- Enterprise ready: Google launch Android Enterprise Recommended
2017
- Year in review: 2017
- Google is deprecating device admin in favour of Android Enterprise
- Hands on with the Sony Xperia XZ1 Compact
- Moto C Plus giveaway
- The state of Android Enterprise in 2017
- Samsung launched a Note 8 for enterprise
- MobileIron officially supports Android Enterprise QR code provisioning
- Android zero-touch enrolment has landed
- MobileIron unofficially supports QR provisioning for Android Enterprise work-managed devices, this is how I found it
- Hands on with the Nokia 3
- Experimenting with clustering and data replication in Nextcloud with MariaDB Galera and SyncThing
- Introducing documentation on bayton.org
- Goodbye Alexa, Hey Google: Hands on with the Google Home
- Restricting access to Exchange ActiveSync
- What is Mobile Device Management?
- 8 tips for a successful EMM deployment
- Long-term update: the fitlet-RM, a fanless industrial mini PC by Compulab
- First look: the FreedomPop V7
- Vault7 and the CIA: This is why we need EMM
- What is Android Enterprise (Android for Work) and why is it used?
- Introducing night mode on bayton.org
- What is iOS Supervision and why is it used?
- Hands on with the Galaxy TabPro S
- Introducing Nextcloud demo servers
- Part 4 - Project Obsidian: Obsidian is dead, long live Obsidian
2016
- My top Android apps 2016
- Hands on with the Linx 12V64
- Wandera review 2016: 2 years on
- Deploying MobileIron 9.1+ on KVM
- Hands on with the Nextcloud Box
- How a promoted tweet landed me on Finnish national news
- Using RWG Mobile for simple, cross-device centralised voicemail
- Part 3 – Project Obsidian: A change, data migration day 1 and build day 2
- Hands on: fitlet-RM, a fanless industrial mini PC by Compulab
- Part 2 - Project Obsidian: Build day 1
- Part 1 - Project Obsidian: Objectives & parts list
- Part 0 - Project Obsidian: Low power NAS & container server
- 5 Android apps improving my Chromebook experience
- First look: Android apps on ChromeOS
- Competition: Win 3 months of free VPS/Container hosting - Closed!
- ElasticHosts review
- ElasticHosts: Cloud Storage vs Folders, what's the difference?
- Adding bash completion to LXD
- Android N: First look & hands-on
- Springs.io - Container hosting at container prices
- Apple vs the FBI: This is why we need MDM
- Miradore Online MDM: Expanding management with subscriptions
- Lenovo Yoga 300 (11IBY) hard drive upgrade
- I bought a Lenovo Yoga 300, this is why I'm sending it back
- Restricting access to Exchange ActiveSync
- Switching to HTTPS on WordPress
2015
2014
- Is CYOD the answer to the BYOD headache?
- BYOD Management: Yes, we can wipe your phone
- A fortnight with Android Wear: LG G Watch review
- First look: Miradore Online free MDM
- Hands on: A weekend with Google Glass
- A month with Wandera Mobile Gateway
- Final thoughts: Dell Venue Pro 11 (Atom)
- Thoughts on BYOD
- Will 2014 bring better battery life?
- My year in review: Bayton.org
- The best purchase I've ever made? A Moto G for my father
2013
2012
- My Top Android Apps 12/12
- The Nexus 7 saga: Resolved
- Recycling Caps Lock into something useful - Ubuntu (12.04)
- The Nexus 7 saga continues
- From Wows to Woes: Why I won't be recommending a Nexus7 any time soon.
- Nexus7: What you need to know
- Why I disabled dlvr.it links on Facebook
- HTC Sense: Changing the lockscreen icons from within ADW
2011
- Push your Google+ posts to Twitter and Facebook
- Using multiple accounts with Google.
- The "Wn-R48" (Windows on the Cr-48)
- Want a Google+ invite?
- Publishing to external sources from Google+
- Dell Streak review. The Phone/Tablet Hybrid
- BlueInput: The Bluetooth HID driver Google forgot to include
- Pushing Buzz to Twitter with dlvr.it
- Managing your social outreach with dlvr.it
- When Awe met Some. The Cr-48 and Gnome3.
- Living with Google's Cr-48 and the cloud.
- Downtime 23-25/04/2011
- Are you practising "safe surfing"?
- The Virtualbox bug: "Cannot access the kernel driver" in Windows
- Putting tech into perspective
2010
- Have a Google Buzz Christmas
- Root a G1 running Android 1.6 without recovery!
- Windows 7 display issues on old Dell desktops
- Google added the Apps flexibility we've been waiting for!
- Part I: My 3 step program for moving to Google Apps
- Downloading torrents
- Completing the Buzz experience for Google Maps Mobile
- Quicktip: Trial Google Apps
- Quicktip: Save internet images fast
- Turn your desktop 3D!
- Part III - Device not compatible - Skype on 3
- Swype not compatible? ShapeWriter!
- Don't wait, get Swype now!
- HideIP VPN. Finally!
- Google enables Wave for Apps domains
- Aspire One touch screen
- Streamline XP into Ubuntu
- Edit a PDF with Zamzar
- Google offering Gmail addresses in the UK
- Google Wave: Revolutionising blogs!
- Hexxeh's Google Chrome OS builds
- Update: Buzz on Windows Mobile
- Alternatives to Internet Explorer
- Wordress 3.0 is coming!
- Skype for WM alternatives
- Browsing on a (data) budget? Opera!
- Buzz on unsupported mobiles
- Buzz on your desktop
- What's all the Buzz?
- Part II: Device not compatible - Skype on 3
- Part I - Device not compatible - Skype on 3
- Dreamscene on Windows 7
- Free Skype with 3? There's a catch..